
Documentation Index

Fetch the complete documentation index at: https://upstash.com/docs/llms.txt

Use this file to discover all available pages before exploring further.

Need a Redis database fast? Skip the signup and dashboard — POST to https://upstash.com/start-redis to get an endpoint and token in a single HTTP request. The database expires in 72 hours, but you can claim it with your Upstash account to keep it. Especially useful for AI agents that need scratch storage on the fly.

GitHub Repository

You can find the project source code on GitHub.

Prerequisites

  1. Create a Google Cloud Project.
  2. Enable billing for your project.
  3. Enable Cloud Functions, Cloud Build, Artifact Registry, Cloud Run, Logging, and Pub/Sub APIs.

Database Setup

Create a Redis database using Upstash Console or Upstash CLI. Copy UPSTASH_REDIS_REST_URL and UPSTASH_REDIS_REST_TOKEN for the next steps.

Counter Function Setup & Deploy

  1. Go to Cloud Functions in Google Cloud Console.
  2. Click Create Function.
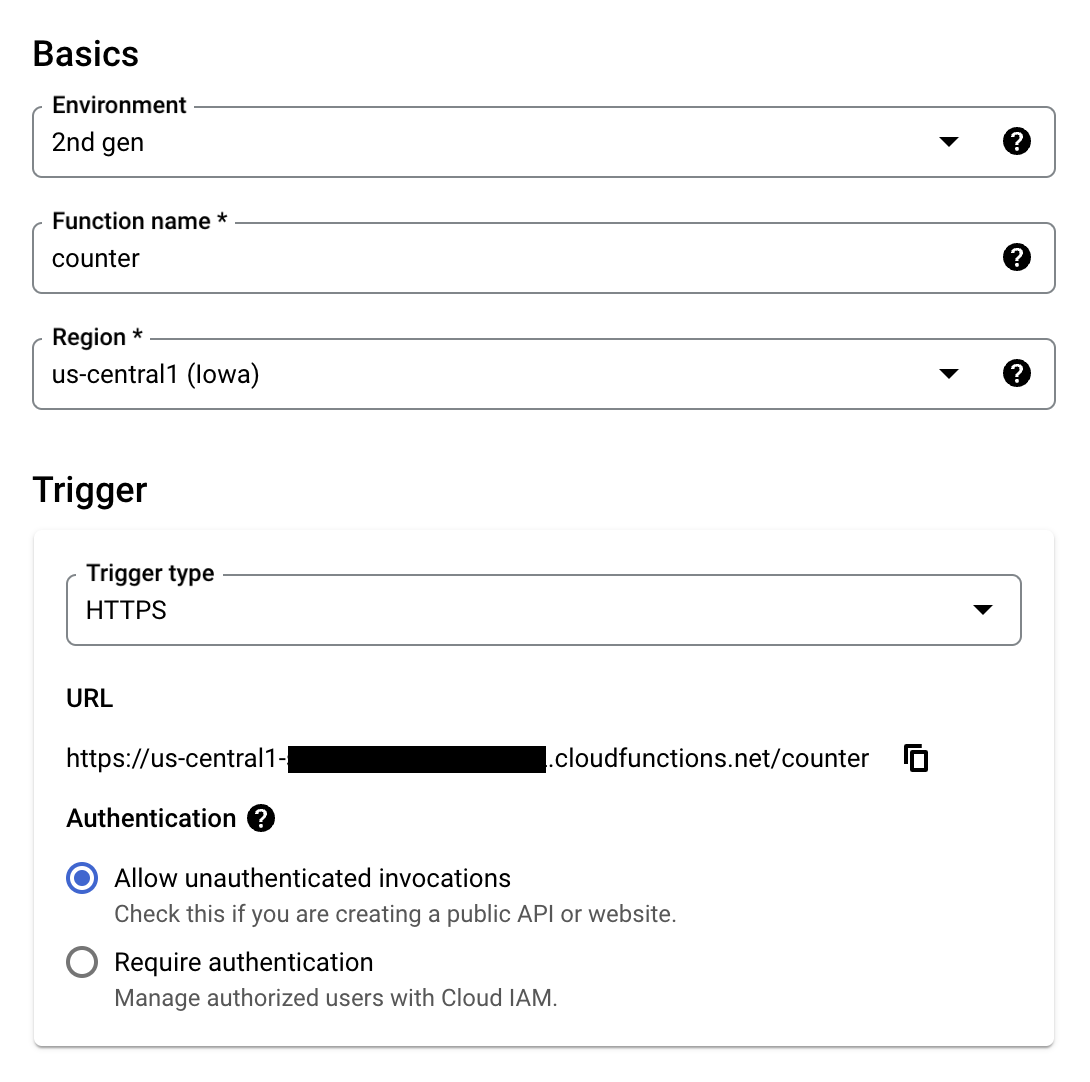
  3. Setup Basics and Trigger Configuration like below:
  4. Using your UPSTASH_REDIS_REST_URL and UPSTASH_REDIS_REST_TOKEN, setup Runtime environment variables under Runtime, build, connections and privacy settings like below.
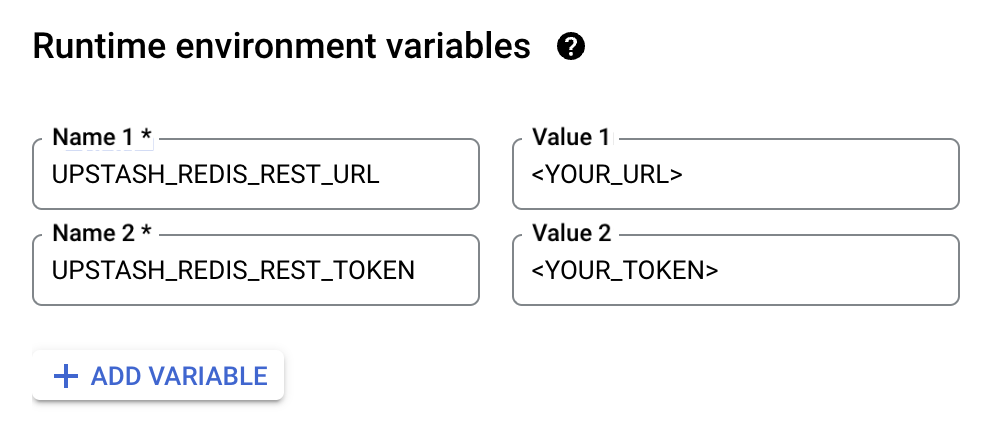
  5. Click Next.
  6. Set Entry point to counter.
  7. Update index.js
index.js
const { Redis } = require("@upstash/redis");
const functions = require('@google-cloud/functions-framework');

const redis = new Redis({
  url: process.env.UPSTASH_REDIS_REST_URL,
  token: process.env.UPSTASH_REDIS_REST_TOKEN
});

functions.http('counter', async (req, res) => {
  const count = await redis.incr("counter");
  res.send("Counter:" + count);
});
  1. Update package.json to include @upstash/redis.
package.json
{
  "dependencies": {
    "@google-cloud/functions-framework": "^3.0.0",
    "@upstash/redis": "^1.31.6"
  }
}
  1. Click Deploy.
  2. Visit the given URL.